Complete instructions to create a retro gaming system with a tiny cheap Raspberry Pi Zero 2 W single board computer.
These devices cost under $20 for a bare board. Case, power and SD card add $20 more, HDMI cables and USB hub another $20, wireless SNES controller another $20. Ultimately not cheap, but an interesting niche use where tiny is valuable.
NEEDS:
Raspberry Pi Zero 2 W.
Micro SD card at least 32GB.
USB Flash drive at least 32GB WITH AN ACTIVITY LIGHT.
Appropriate adaptor cables for mini HDMI, micro USB and power.
PREP:
Use standard RASPBERRY PI IMAGER program for Windows (download/install as needed):
Insert SD card to be imaged (completely rewritten).
Pick: Device > Raspberry Pi Zero 2 W
Pick: OS > Emulation and Game OS > RetroPie > Pi 2/3/Zero2W
Ignore Windows messages about drive formatting.
Remove SD card when imager program instructs that it is completed.
Format a USB flash drive FAT32.
Create a \RETROPIE folder on it.
On your Raspberry Pi Zero 2 W ("RPiZero2W"):
Connect a multiport USB hub to the middle micro USB jack.
Connect a monitor to mini HDMI jack.
Insert SD card imaged in prior step.
Plug USB flash drive into the USB hub.
Plug a basic wired keyboard into the USB hub.
(Optional) Plug a basic wired game controller into the USB hub.
Connect power to bottom micro USB jack.
The system should boot, resize it's own file system to the SD card, and reboot itself again.
CONFIG:
Welcome to your new Raspberry Pi Zero 2 W RetroPie gaming system.
On first complete boot to RetroPie, configure the game controller as prompted by the CONFIGURE INPUT dialog.
Press each controller key as directed.
For buttons not present, hold down the A button on controller a second to skip.
For the final HOTKEY ENABLE button, press SELECT on the controller again.
Press A to confirm final OK.
Pick RETROPIE from main RetroPie menu.
Pick RASPI-CONFIG and configure:
> Display Options > Screen Blanking > No
> Display Options > Resolution > 640x480 (best performance)
> Time Zone > set appropriately
> Localization Options > WLAN Country > USA
Save. May auto-reboot.
Optionally again pick RETROPIE from main RetroPie menu. Pick WIFI and configure.
Again pick RETROPIE from main RetroPie menu.
Pick RUN COMMAND CONFIG and configure (all for best performance):
> Launch Menu > Disabled
> Launch Image Delay > 0
> CPU Governor > Performance
Save and quit back to RetroPie.
From RetroPie menu press START on game controller for MAIN MENU.
Configure GAME COLLECTION SETTINGS:
> Automatic Game Collections > All Games + Favorites + Last Played
> Press Y Twice to remove... > On
Configure UI SETTINGS:
> Screen Saver Settings > Screensaver Behavior > Random Video
> Transition Style Instant (for best performance)
> Start on System > Favorites
From MAIN MENU pick:
Quit > Shutdown
Remove Power
Remove USB flash drive
ADDING GAMES:
Plug USB flash drive into your main computer.
Its RETROPIE\roms folder should now be populated with folders for supported platforms.
At minimum simply copy game ROM files to appropriate platform subfolders.
Also supports zipped files, and thumbnails and videos folders.
For a full system of basics that run well and require only the classic SNES style controllers without analog thumb pads, I focus on only the following platforms: atari2600, nes, snes, megadrive, GBA and Sega32.
On my system I copied the full folders of zipped ROMs for these platforms including thumbnails, videos and marquees from a large existing full RetroPie image from another system.
When done copying ROMs etc to appropriate folders on the thumb drive, remove it safely.
Plug the thumb drive into the USB hub and power on the RPiZero2W.
RetroPie will now scan the flash drive and copy and ROMs and related found onto it's SD drive.
Even as the system boots, and starts showing a game list, it may still be copying from the flash drive as a background task. Best to not start any games yet.
Wait patiently UNTIL THE USB flash drive activity light stops blinking.
After the flash drive goes inactive, press START for the MAIN MENU, pick QUIT then SHUTDOWN. Remove the flash drive.
Total games:4314 (Atari2600:664, NES:864, SNES:786, Genesis:901, GBA:1066, Sega32:33)
Restart your RPiZero2W.
From the ALL GAMES menu, mark favorites by pressing Y on each.
After marking all favorites, press START for MAIN MENU > QUIT > SHUTDOWN to save.
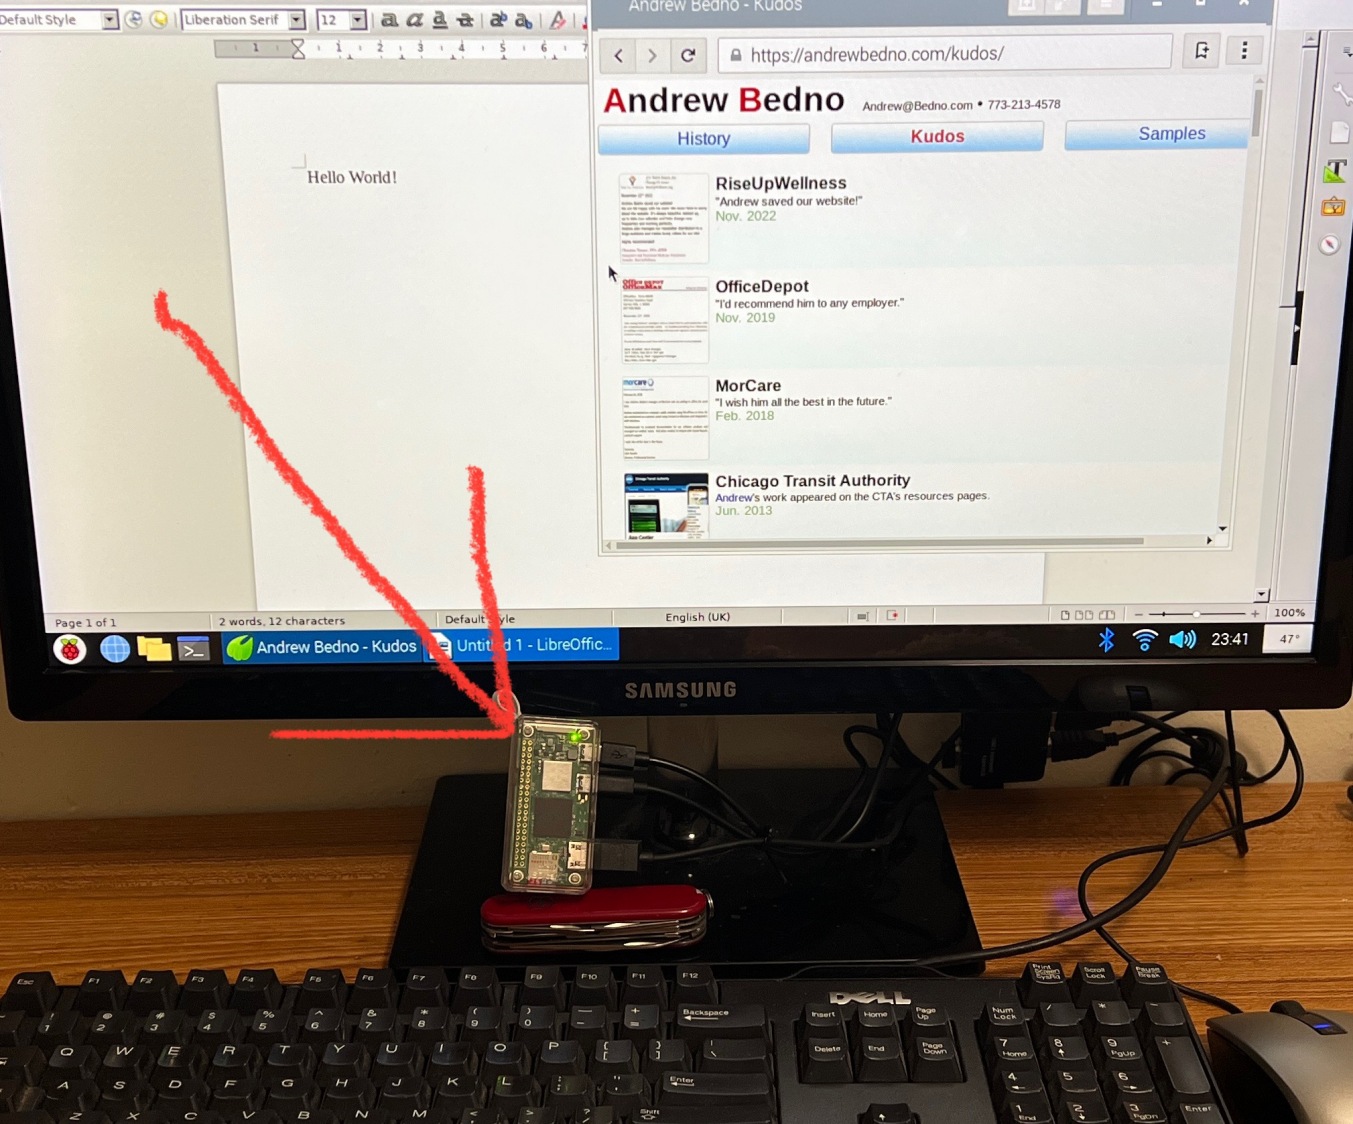
PIXEL DESKTOP:
Optionally install a full windowing desktop capable of running a browser and office apps.
Pick RETROPIE from main RetroPie menu.
Pick RASPI-CONFIG and configure:
> Performance > GPU Memory > 128 (leaves more RAM free for desktop performance)
Save. May auto-reboot.
Again pick RETROPIE from main RetroPie menu.
> Configuration / Tools > raspiantools > Install Pixel Desktop Environment
Wait patiently until done, easily ten minutes. Requires WiFi.
Customize Task Bar and Panel Applets as desired.
Exit to return to RetroPie, or Shutdown to power off.
Pixel Desktop will now appear on your RetroPie's under a new PORTS platform.
Recommended additions:
sudo apt install midori (extremely lean browser as Chromium is to heavy)
sudo apt install gparted (drives/partitions display)
sudo apt install libreoffice (major free office apps suite)
Parts list on Amazon
See related article on building a larger RetroPie gaming system with a Raspberry Pi 4
↑ ZOOM MORE
2021.02.13