Electronic Bike Bell (v3) with 20 sounds. Built with an ESP32 microcontroller. Connects to a bike stereo.
Starts with a classic bike bell sound. Tap the button to play. Hold the button to skip through available sounds (at reduced volume) then release the button to select. Tap the button while playing to restart a sound.
The sounds are: ring, caw, ahooga, boat, steam, honk, bong, laughs, cheers, godzilla, howl, james, phaser, photon, beep, charge, shofar, unicorn, whistle, smash.
All sounds have only one repeat on the thinking that if users want Ring Ring or Caw Caw for example they can simply repeat tap. The on-board LED blinks once when a sound starts to give feedback of button press. If the button seems stuck too long the device automatically goes silent.
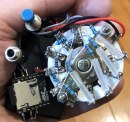
This is the second upgrade on my THIRD major implementation of this project. It originally started with Bedno.com/bell - my Virtual Bike Bell webapp, which I created wanting special sounds like crow and shofar. Though there are some electronic bike bells and noise devices, I found none with programmable sounds and aux out. That version runs in phone browsers and connects with bluetooth. I then proceeded to try to implement in hardware for faster response and simplified use. A prior version using a "DFplayer Mini MP3 player" audio module hit too many limits, leading to this ESP32 one, first to analog oututs, then adding Bluetooth. The entire build required only five solder points on the ESP32 board (button,2xOut,2xGnd) and replacing the battery connector. Conceivably one could use a touchpad input for one less wire but those don't work with gloves. I fit the whole thing into a clear plastic case only 2"x2"x1" with a Velcro ribbon for attaching to bike and a foam block to reduce vibration. This is the second upgrade on my third major implementation of this project. It originally started with Bedno.com/bell - my Virtual Bike Bell webapp, which I created wanting special sounds like crow and shofar. Though there are some electronic bike bells and noise devices, I found none with programmable sounds and aux out. That version runs in phone browsers and connects with bluetooth. I then proceeded to try to implement in hardware for faster response and simplified use. A prior version using a "DFplayer Mini MP3 player" audio module hit too many limits, leading to this ESP32 one, first to an analog output jack, then adding Bluetooth. The entire build required only five solder points on the ESP32 board (button,2xOut,2xGnd) and replacing the battery connector. Conceivably one could use a touchpad input for one less wire but those don't work with gloves. I fit the whole thing into a clear plastic case only 2"x2"x1" with a Velcro ribbon for attaching to bike and a foam block to reduce vibration.
The audio jack is directly connected to DAC (Digital to Analog Converter) output pins. Electronics intuition is this should use a 1K/1k resistor voltage divider on each to bring the signals into a 0-2V range as typical of line outputs (shown as optional in the schematic but untested). But experience showed most bike speakers tolerated the full Gnd-Vcc(3.7V) range witth little distortion. Some low pass filtering and DC blocking would also be typical but I've had no ill effects without. A testament to the ESP32's robust IO circuitry and the input conditioning on bike stereos. The audio jack is wired DAC outs to tip and ring, and sleeve to ground. Identical audio goes to both channels, dual mono as opposed to stereo, just to force speakers to recognize both. Connecting ring to ground (which would accurately be a legacy mono plug) or bridging tip and ring caused some speakers to not work. Be careful soldering jack and button as their plastic cases melt quickly. One could leave off the jack entirely if building for Bluetooth only use.
The battery automatically charges when the device is connected to USB. There's a tiny power switch next to the microUSB on my board which can be turned off when unused for extended periods (switch side toward board edge). A 500mAh battery runs 15hrs despite a tiny red power LED always using some current. In my case the ESP32 has a tinier battery connector than the battery does, but it came with the right cable and I spliced them. Be careful when cutting and soldering battery wires to remove load and keep leads separate, and careful of solder and tool shorts as the charge is not insignificant. I would've liked to implement auto-poweroff but it would require additional components.
Any ESP32 board can run this. I used a "mini" because the project is simple and to make it tiny. Same with the choice of a battery. Both actually cost slightly more than larger versions. I also didn't want the wire wrap legs that comes on most dev boards. My board appears to be a LilyGO v1.3 but had several pins different, also default LED setting didn't work and I had to write a test program to find it. Check your board's doc carefully, especially regarding battery polarity. I picked the button's pin based on ease of access. If re-compiling presume that all pin constant assignments at the top of the program will need updating for your board and wiring needs. I used the stock Arduino IDE, which required installing ESP32 support. There are videos on YouTube about this. Sadly it's a slow and simple compiler. My board required a USB driver which windows update found at some length.
The program is only a few hundred lines (plus the huge sound file headers) but required knowledge of some advanced and specialized techniques. The language seems to be C++ with extensions. User interfacing is assisted by a servicing routine that's called 100 times a second by a timer interrupt. This handles button debounce, skip and blink timing. Wav playback is implemented using a timer service at 50KHz to feed the DACs, adjusted from wav data of any rate.
The audio is eight bit mono mostly 32kHz which is fairly lo-fi but works fine for this usage. All sound sources were public domain then heavily cropped, edited, processed, enhanced and normalized to maximize volume. The sounds are encoded as raw wav byte constant arrays compiled into the program for access speed. The steps to create these are load it in "Audacity" (a free sound editor), merge tracks and normalize, resample to 32K, then save as and select "other uncompressed format" and pick Microsoft WAV and 8-bit PCM. Open the resulting output in HxD (a free hex file editor). export the file in "C format" but use .h extension. Finally edit the top to that to match other sound constant declarations. A maximum of about one minute total of all samples fits in 3MB.
One wishing to re-create this device could buy similar parts, confirm pins equivalent to schematic and solder them. Install the USB driver and IDE. Download source tree from GitHub repository. Open EBB.ino and update pin constants as needed. Compile using the Huge APP partition scheme to give max memory to the program, and upload. I'd be happy to custom build on demand but parts alone were >$30 so it's not dirt cheap.
PARTS:
ESP32 mini board (~$16):
Like https://www.amazon.com/dp/B07RT9DYR4
Lipo battery, 3.7V >=250ma (~$8.49):
Like https://www.amazon.com/dp/B07BTKPSNP
Tiny button, panel mount (x4 =$1.75@):
Like https://www.amazon.com/dp/B07ZHCBH6Q
Audio jack, stereo 3.5mm panel mount (x2 =$3@):
Like https://www.amazon.com/dp/B07JNR4PXN
Program source on GitHub:
https://github.com/Bedno/electronic_bike_bell [MIRROR]
RESOURCES:
CP2104 USB to UART Bridge Controller:
https://www.silabs.com/developers/usb-to-uart-bridge-vcp-drivers
SPECIFICALLY the "CP210x Universal Windows Drivers" (direct link: https://www.silabs.com/documents/public/software/CP210x_Universal_Windows_Driver.zip)
NOTE: This is REQUIRED for first time connects, or will show as error in device manager. Be VERY careful to not trust microUSB cables which are often power only.
Arduino IDE ("Integrated Development Environment"):
https://www.arduino.cc/en/software/
File > Preferences > "Additional Board Manager URLs" addition for ESP32:
https://dl.espressif.com/dl/package_esp32_index.json
ESP32 Mini docs:
https://github.com/LilyGO/ESP32-MINI-32-V1.3
Audacity wav editor:
https://audacity.en.softonic.com/download
HxD hex editor:
https://mh-nexus.de/en/hxd/
Audio jumper cable, high quality very short ($5.59):
https://www.amazon.com/dp/B004G7U40Y
Virtual Bike Bell webapp project which preceded this:
https://github.com/Bedno/Virtual-Bike-Bell
SCHEMATIC:

"Virtual Bike Bell" WebApp version:

https://bedno.com/bell
Prior hardware version:

NEW!!! 5.x version - Now with sentience.
UP RELATED ZOOM OFFSITE
2022.02.16